2.1 Fun with slow shutter speeds
1. I don’t live close to a busy street so I had to use my boyfriend and our dog to move past the object. For the object I simply just used a tree that is in our garden. The interesting thing about this task is that you can’t really see anyone moving past the tree, but you can see some motion blur in the picture.

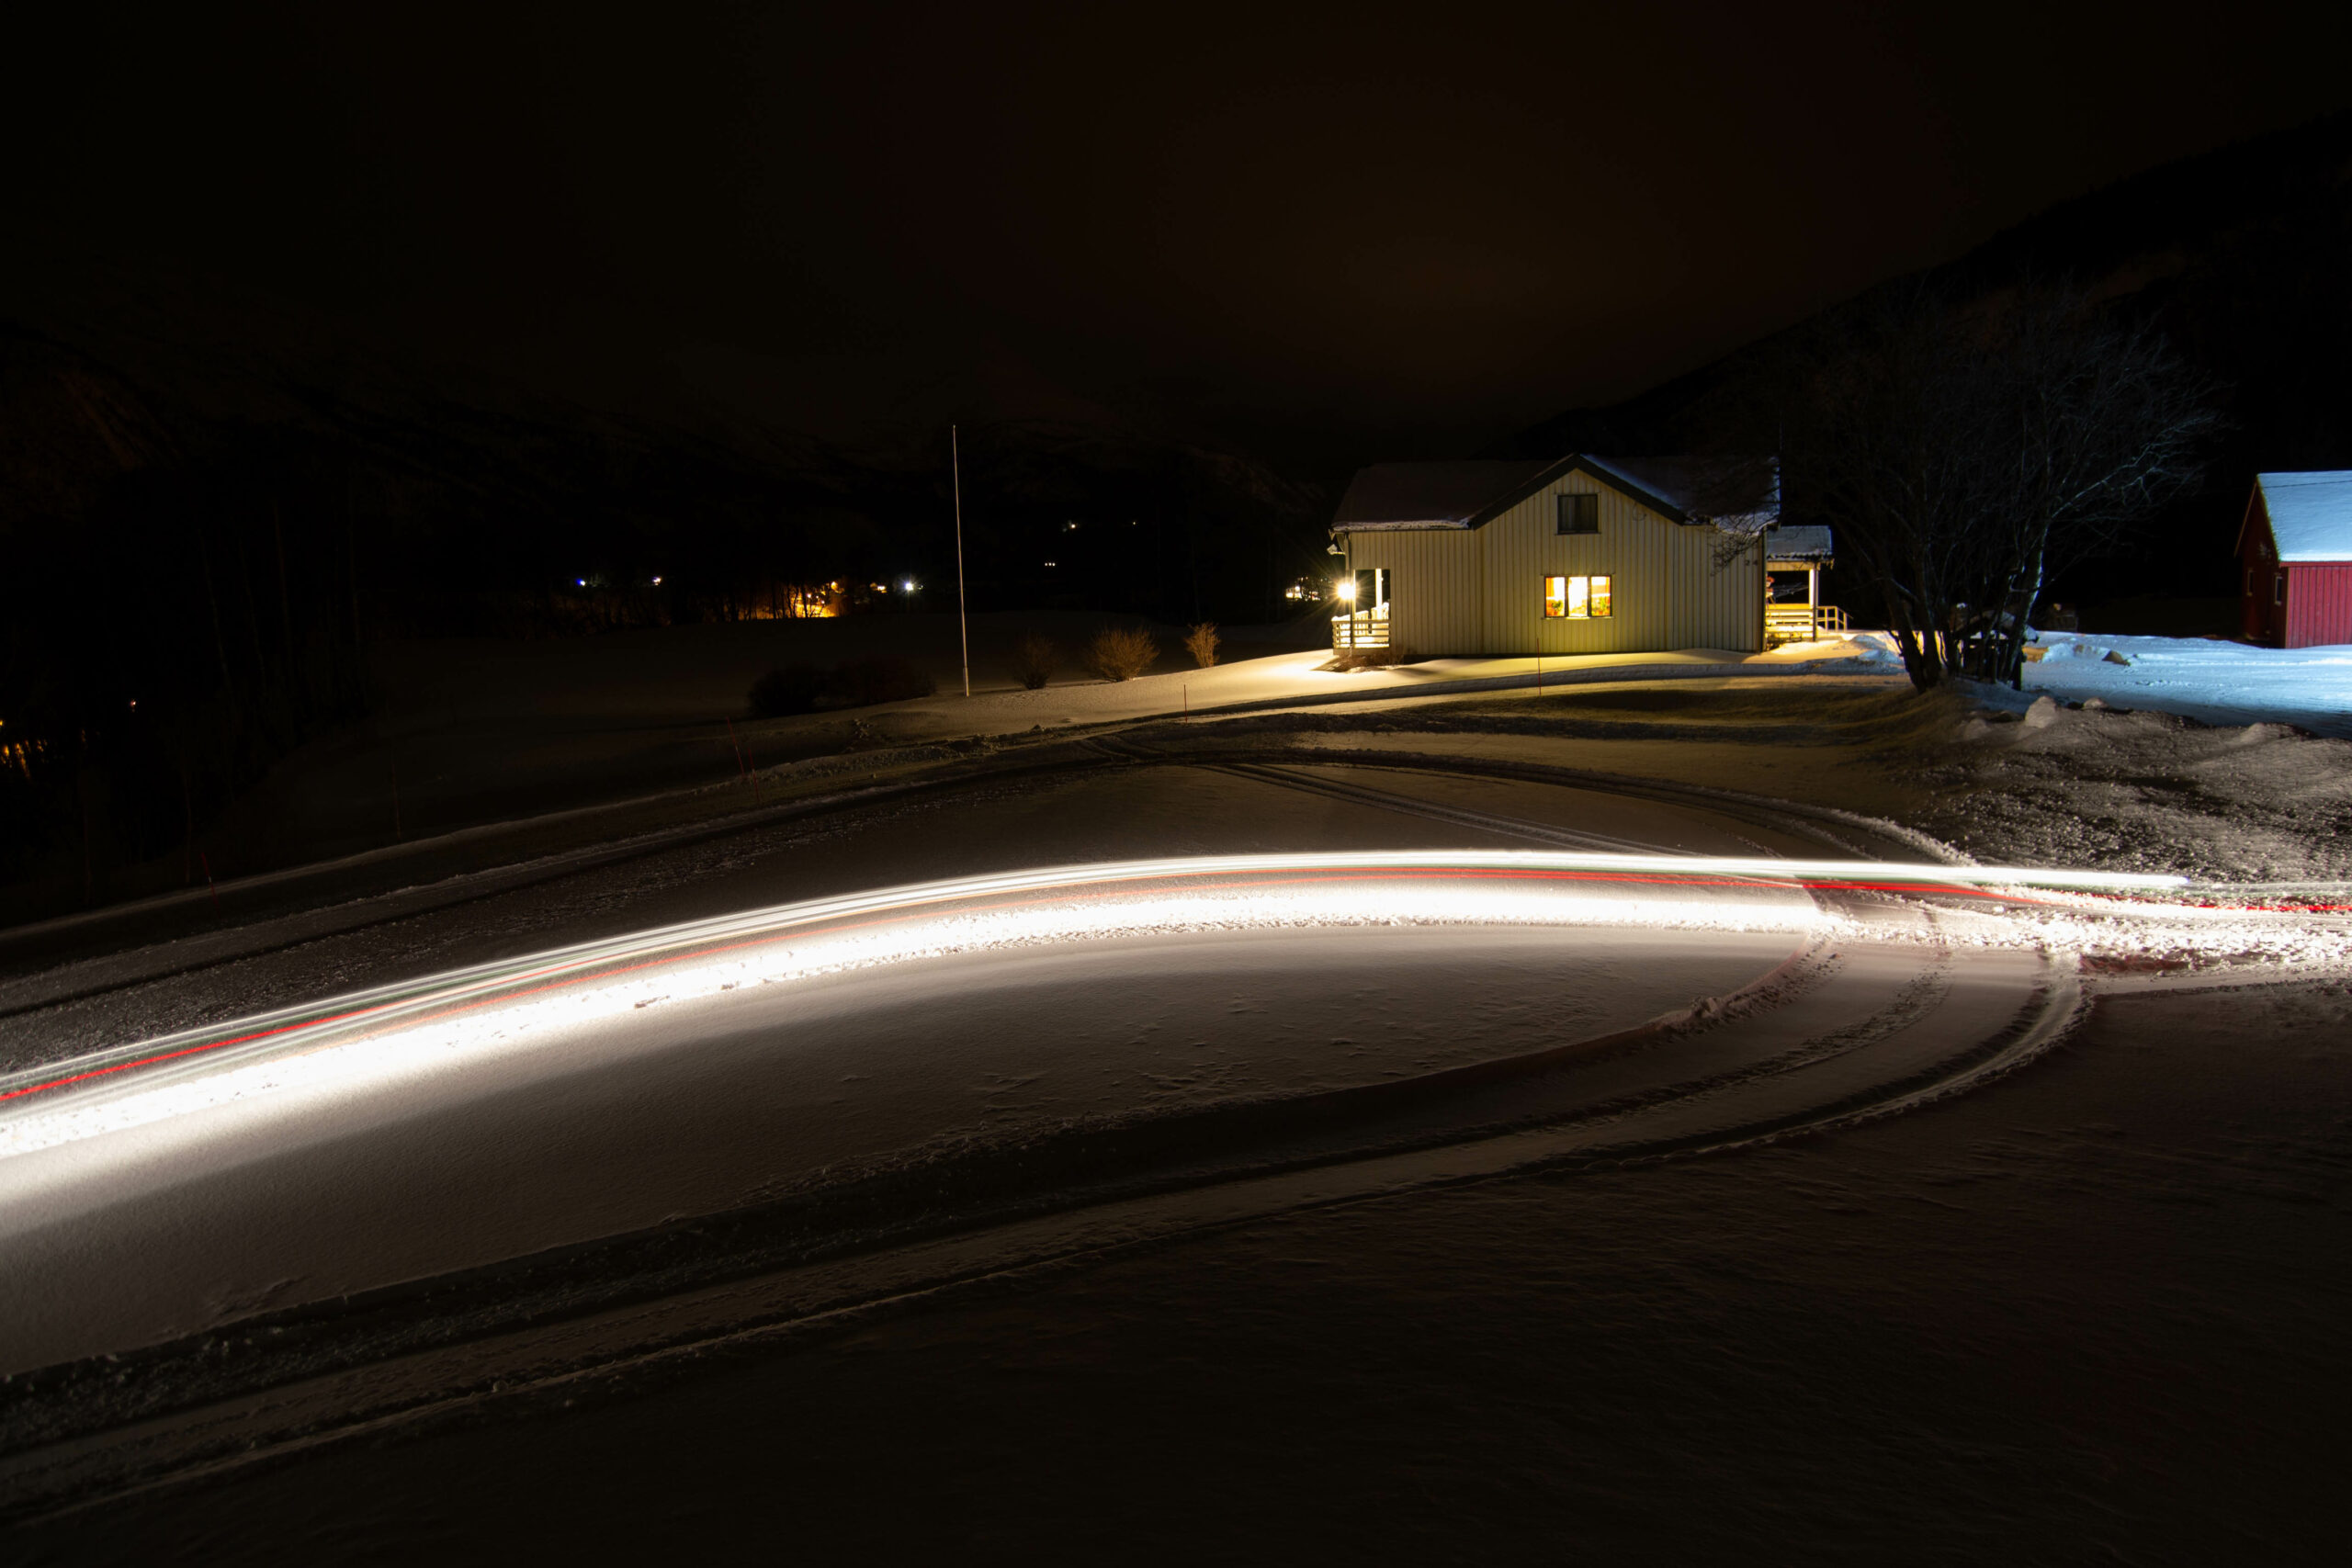
2. Here, I asked my boyfriend to drive the scooter/snow mobile over the fields. I went as high as I could, upstairs on out balcony and took the picture.

3. This task I did myself, and simply just set a timer on my camera. I first used a flash light to draw a circle. Then I used a LED candle to draw a triangle.


2.2 Basics of low light photography
Taking low-light photographs can be quite tricky and frustrating if you don’t know what you are doing. It can be tempting to set the camera to Auto, but this should be avoided. First things first, you need a DSLR camera. Yes, mobile phones these days have cameras which get better and better, but no mobile camera can compare to a DSLR camera, especially when it comes to low-light photography.
Once you have your camera, there are some obvious but important things to remember. Make sure you have a fully charged battery, as low-light photography can take some time, and many times you are out taking pictures in cold weather. If you have two batteries, you can have a fully charged battery in your pocket in case the one in the camera dies. Another important thing to remember is to have an empty memory card. Here it can also be smart to have an extra one just in case. Also, set your camera file format to the highest possible as well as choosing RAW-format.
Now you have your camera all set and you are ready to go out and take low-light photographs. If you haven’t got it yet, I highly recommend you to buy a tripod. A tripod is essential to capture good quality low-light photographs as it keeps the camera still. The shutter speed is a setting that is very important. The slower the shutter speed, the more light your camera captures. Before hitting the button, make sure you have your camera on a tripod and that your focus is set right. It is also a good idea to use the timer on your camera to avoid shaking or moving the camera while taking the picture. The ISO setting should be as low as possible, preferably under 100 as a higher number might cause grainy images. No matter what, do not use the flash unless you are certain that it will create a cool effect.
2.3 Shooting in low light conditions
Take four low-light photographs.
The first should be a sharp photograph that focuses on a static object, like a building or statue.

The second photograph should showcase moving objects, like cars or running water.
For the third photograph, take a moody portrait of a friend and use high ISO settings to your advantage.

The fourth photograph should explore using external light sources, like a Speedlite flash. (Please note that you may leave it out if you don’t have the equipment to take this last photograph.)
I do not have the equipment to do this task.